
Upload and Organize Files
Files can be attached to projects, tasks, and team members. This guide shows how to add files, organize them into categories, rename them, and remove them.
Before you start: You’ll only see the add, edit, and delete options if your role allows it, and you’ll only be able to open a record’s files if you can view the record itself. See Roles and access.
Add a file
Section titled “Add a file”- Open the project, task, or team member.
- Go to the Files section.
- Click Add file.
- Choose a file from your device. You can upload images (JPG, PNG, WEBP), PDFs, and DXF drawings, up to 25 MB each.
- The file uploads and appears in the list right away, under Uncategorized.
Some areas only accept a specific type of file. If so, the file picker only offers that type.
Give a file a category
Section titled “Give a file a category”Categories work like folders and keep related files grouped together.
- Find the file in the list. Each row has three buttons on the right: download, edit (pencil), and delete (×).
- Click the edit (pencil) button. An Edit File window opens.
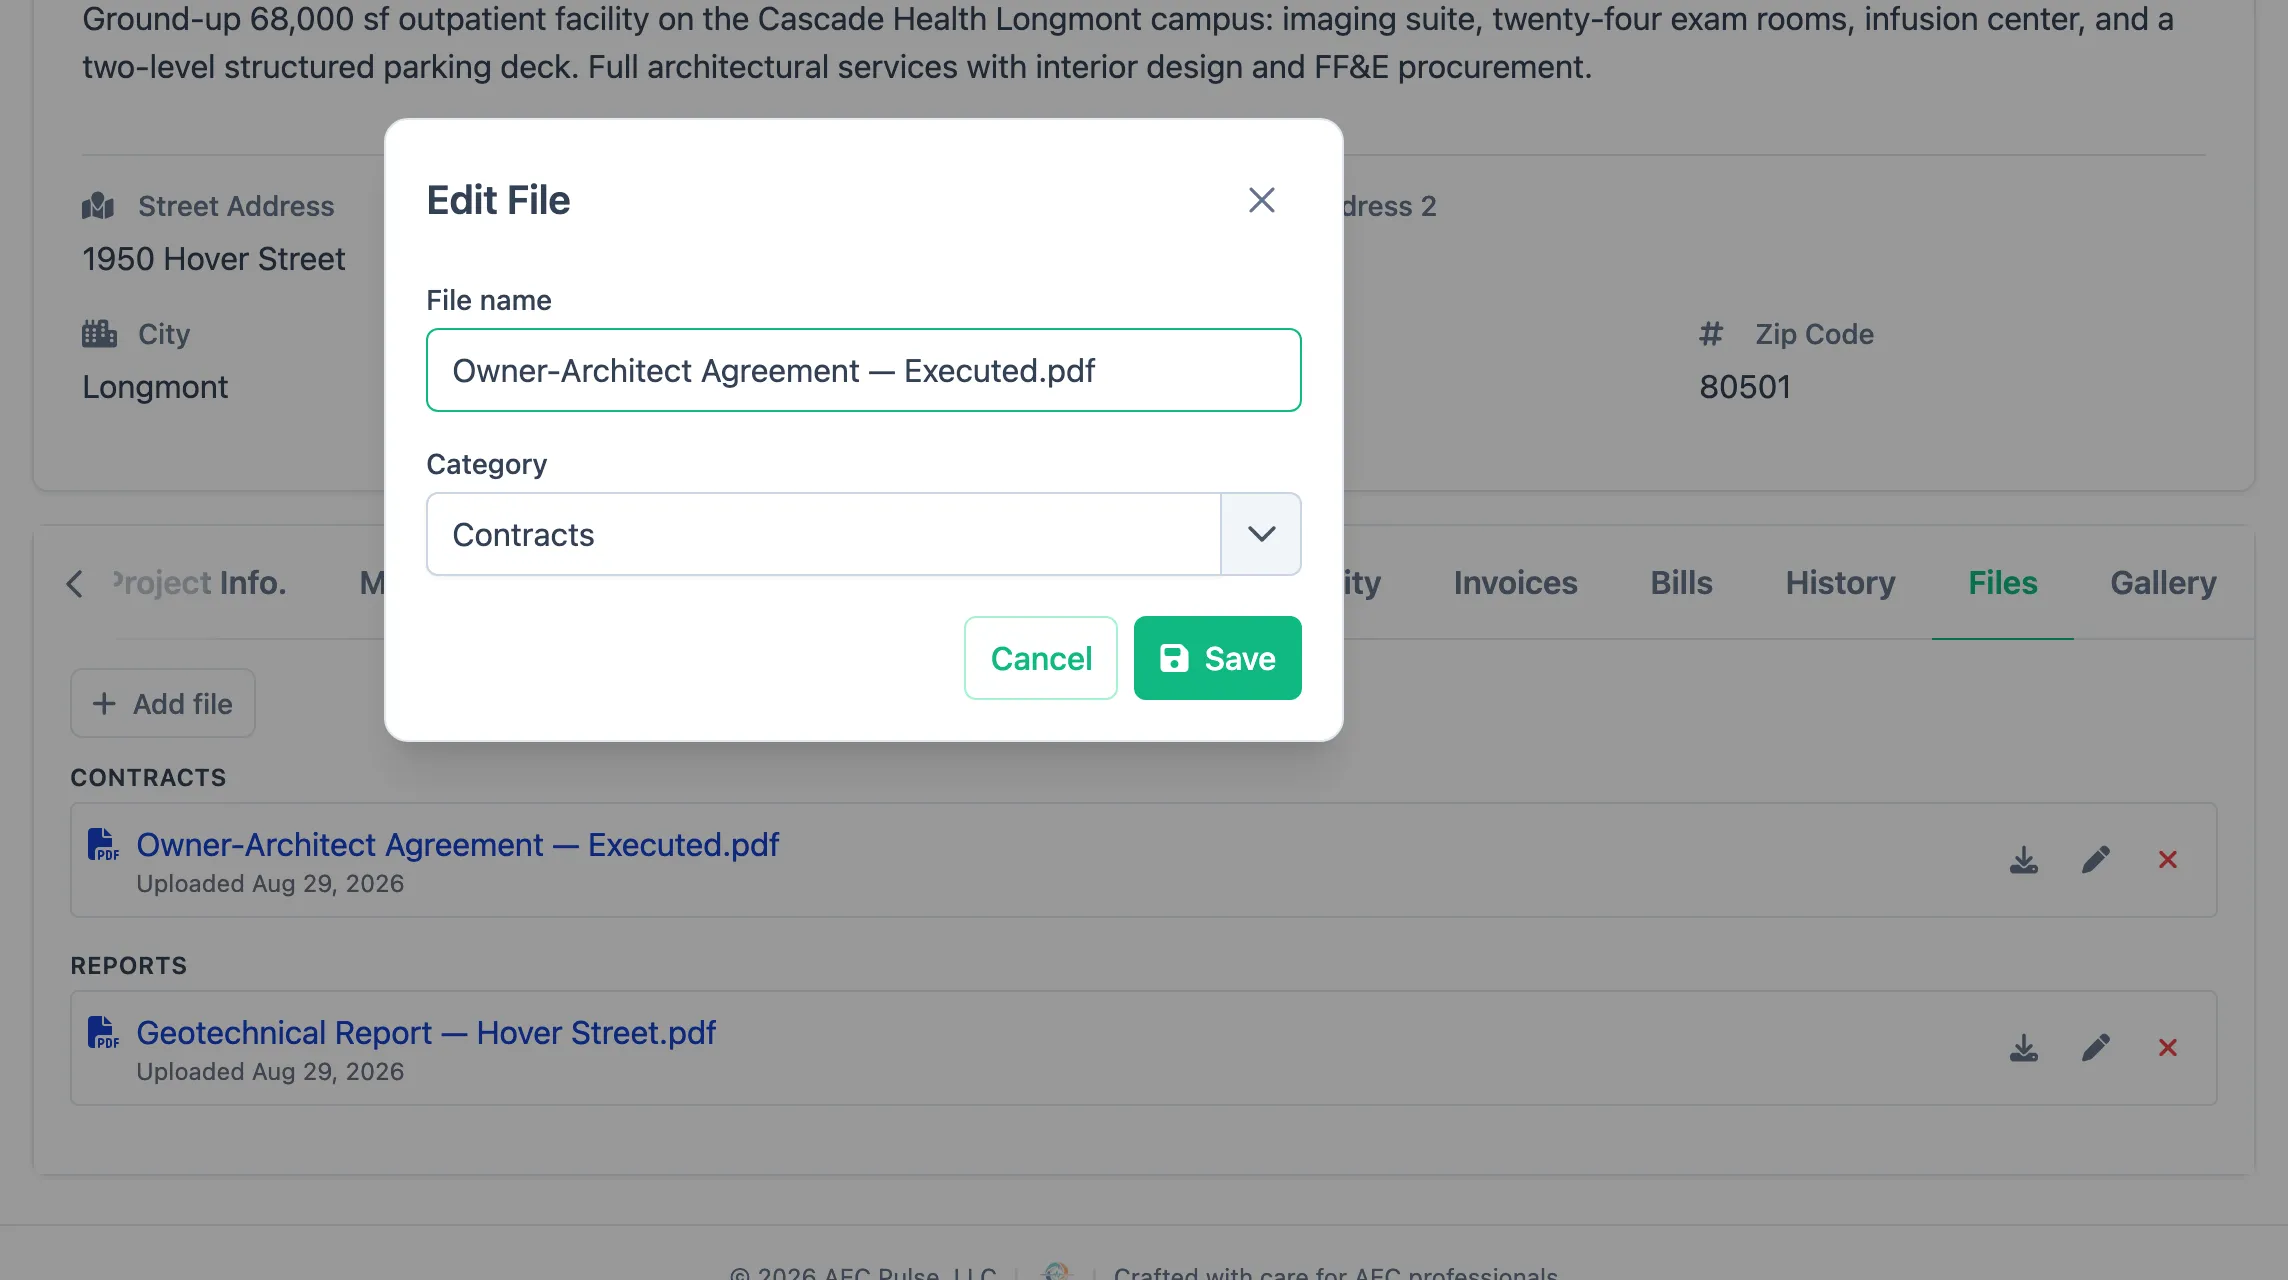 3. In the Category box, pick one of your existing categories from the dropdown, or type a new label — for example, Drawings, Photos, or Permits.
4. Click Save.
3. In the Category box, pick one of your existing categories from the dropdown, or type a new label — for example, Drawings, Photos, or Permits.
4. Click Save.
The file moves under that category’s heading. Putting other files in the same category groups them together — picking from the dropdown is the easy way to be sure the name matches exactly.
Rename a file
Section titled “Rename a file”You rename a file in the same window you set its category:
- Click the edit (pencil) button next to the file.
- Change the File name.
- Click Save, or press Enter in the name box.
You can change the name and the category at the same time — both are saved together. Click Cancel to discard your changes.
Download a file
Section titled “Download a file”Click the download button on the file’s row to save a copy to your device.
How files are grouped
Section titled “How files are grouped”- Files are shown under a heading for each category.
- Files with no category are grouped under Uncategorized, always shown at the bottom.
- Named categories are listed alphabetically.
Open a file
Section titled “Open a file”Click a file’s name to preview it in a window over the page. Close the preview to return to where you were. DXF drawings can’t be previewed, so clicking one downloads it instead.
Delete a file
Section titled “Delete a file”- Click the delete (×) button next to the file.
- Confirm when prompted.
The file is removed from the record.